
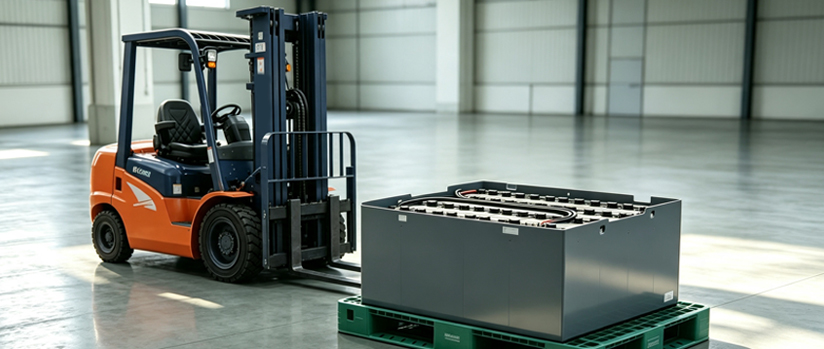
The battery is the heart of any electric forklift. Whether you're swapping out a worn-out lead-acid unit or upgrading to a new lithium-ion model, doing the job right isn't just about getting the truck back to work—it's about keeping everyone safe and protecting expensive equipment. A sloppy changeover can lead to downtime, damaged components, or even personal injury.
When Does a Forklift Battery Need Replacing?
No battery lasts forever. Over time, performance fades, and you'll start noticing signs that a replacement is overdue. Keep an eye out for:
- Noticeably shorter run times between charges
- Charging more and more frequently to get through a shift
- Sluggish travel and lift speeds
- Cracks or leaks in the battery casing (especially with lead-acid units)
- Batteries that feel unusually hot during use or charging
- Lithium batteries triggering repeated BMS (Battery Management System) warnings
- The battery simply reaching the end of its rated service life
Putting off a replacement only leads to unplanned downtime and can put added strain on the forklift's electrical system. Acting early saves headaches later.
Before You Start: Essential Safety Checks
Take a few minutes to get the work area and the truck ready. This isn't optional—it's the foundation of a safe swap.
- Park the forklift on a level, solid surface
- Lower the forks all the way to the floor
- Set the parking brake firmly
- Turn off the main power switch
- Remove the key and keep it in your pocket
- Unplug the charger from the wall and from the truck
- Put on your PPE—gloves, safety glasses, and steel-toe boots at minimum
- Make sure the area is well ventilated
- Never leave metal tools or loose parts resting on top of the battery
If you're dealing with a lead-acid battery, remember: the electrolyte is sulfuric acid, and charging produces hydrogen gas. Keep sparks, flames, and smoking far away from the work area.
Step 1: Shut Down the Forklift Completely
Double-check that the truck is truly dead before you touch anything.
Confirm:
- Main power is off
- The emergency stop button is engaged or in its safe position
- The charger cable is disconnected from both ends
Don't skip this. Working on a live system is asking for trouble.
Step 2: Disconnect the Battery Connector
Locate the main battery plug—it's usually a bulky, colored connector near the battery compartment.
Grip the plug housing firmly and pull it straight out.
Do not yank on the cables. That can damage the wiring and lead to expensive repairs down the line.
While the connector is apart, give it a good look:
- Any signs of burning or melting?
- Terminals loose or wobbly?
- Corrosion or greenish buildup on the contacts?
- Cable insulation cracked or worn through?
If you spot any of these, plan to replace the connector assembly along with the battery.
Step 3: Remove the Old Battery
The method depends on how your forklift is set up.
Side-pull style:
Open the battery compartment door. Using a battery roller stand or a dedicated battery changer, carefully pull the battery straight out along the rollers. Keep it level as it comes out—no tilting.
Overhead-lift style:
Attach a proper lifting sling or beam rated for the battery's weight. Use an overhead crane or hoist to lift it straight up and out.
Critical rule: Never attach lifting chains directly to the battery terminals or posts. That will damage the battery and could cause a dangerous short circuit. Always use the designated lifting points or a purpose-built lifting frame.
Step 4: Inspect and Clean the Battery Compartment
With the old battery out, take a moment to check the empty compartment before sliding the new one in.
Look for:
- Dust, dirt, or debris that's collected over time
- White or crusty corrosion deposits (especially around the bottom and corners)
- The battery hold-down brackets—are they bent, rusted, or loose?
- Worn or chafed cables running through the compartment
- Any signs of hydraulic fluid leaks from nearby systems
A clean, dry compartment helps the new battery run cooler and last longer. Wipe it down and fix any issues before moving forward.
Step 5: Install the New Battery
Carefully position the new battery and slide or lower it into place.
Make sure:
- It sits flat and level in the compartment
- The battery weight matches the original specification—this is important because the battery acts as counterweight for the truck
- The connector faces the correct direction for easy access
- The hold-down brackets or clamps are snug and secure
A battery that's too light or too heavy can affect the forklift's stability, especially when lifting heavy loads. Don't guess—check the nameplate or the manual.
Step 6: Connect the Battery
Plug the battery connector back into the truck's receptacle.
Press it in until you feel or hear it click fully home.
Check that:
- The plug is fully seated, not halfway in
- The cables aren't twisted or under tension
- No wires are pinched between the battery and the compartment frame
- The terminals are clean and making solid contact
If the connector doesn't slide in easily, stop and check alignment. Forcing it can break the locking tabs or damage the pins.
Step 7: Power Up and Test
Now it's time to see if everything works.
Turn the key on and watch the display.
Run through these checks:
- Battery charge indicator shows a reasonable level (not zero, not an error code)
- No warning lights or fault messages on the dash
- Steering responds smoothly
- Lift and lower functions operate without hesitation or odd noises
- Forward and reverse engage cleanly
- Horn works
- Emergency stop button cuts power when pressed
Finally, take the forklift for a slow test drive around an open area. Drive forward, reverse, turn, lift a small load, and lower it. Only put the truck back into regular service once you're certain everything is working normally.
After the Swap: Daily Care That Makes a Difference
How you treat the new battery in the first few weeks sets the stage for its whole life.
For lead-acid batteries:
- Always use the charger that's matched to the battery
- Top up with distilled water **after** a full charge, unless the manufacturer says otherwise
- Wipe down the top surface regularly to prevent dirt buildup and tracking
- Check electrolyte levels weekly—don't let the plates get exposed
- Avoid running it down to empty whenever possible
For lithium batteries:
- Stick with the original manufacturer's charger or one specifically approved for lithium chemistry
- Keep the battery out of direct sunlight and extreme heat where possible
- Check the BMS display or app for any alerts regularly
- Inspect connectors for looseness or dirt every few weeks
- Follow the manufacturer's guidance on charge/discharge cycles—some prefer partial charges, others full cycles
Good maintenance isn't complicated, but it pays off. A well-cared-for battery can outlast a neglected one by years.
Final Thoughts
Replacing a forklift battery correctly is essential for maintaining safety, maximizing productivity, and extending the service life of both the battery and the forklift. Whether you're using a lead-acid battery or upgrading to a lithium battery, following the proper replacement procedures helps reduce downtime, improve operational efficiency, and ensure reliable performance in demanding warehouse environments.
At LiftTop, we specialize in supplying high-quality forklift batteries, battery chargers, battery connectors, and a full range of forklift replacement parts for leading brands including Toyota, Hyster, Linde, Jungheinrich, Mitsubishi, TCM, Komatsu, EP, HELI, Hangcha, Noblelift, and many more.
Looking for the right forklift battery or spare parts? Contact us today for expert product recommendations, OEM/ODM services, and fast quotations. We're ready to support your business with dependable products and responsive service.
Get Latest Deals from Anhui LiftTop Mechanical and Electrical

Send Us Email
Email : simon@lifttops.com
Address


 IPv6 network supported


 English
 English
 français
 русский
 español
 português
 العربية